Google Tag Manager (GTM) for Conversion Tracking
To implement Server-to-Server (S2S) tracking via Google Tag Manager, please ensure the following prerequisites are met:
- Unified Domain: All tracking actions must occur on the same website/domain.
- GTM Installation: A correctly configured GTM container must be installed on your website.
- Configured Triggers: Trigger points for target events (e.g.,
Registration,Purchase, orLead) must be pre-configured in GTM. - Cookie Setup: A script must be deployed to capture and store the MyBid Visitor ID in a browser cookie.
- Postback Script: A secondary script must be configured to retrieve the stored ID and fire the postback to MyBid upon event completion.
How to Set Up Google Tag Manager
1. Create a GTM Account
- Visit the Google Tag Manager website.
- Click Start for free and sign in with your Google account.
- Create a new account by entering an account name and setting up a container (select "Web" for website tracking).
2. Install GTM on Your Website
- After creating your container, GTM will provide two code snippets.
- Snippet 1: Paste this as high in the
<head>of your website pages as possible. - Snippet 2: Paste this immediately following the opening
<body>tag. - Save and publish your container.
3. Verify Installation
- Use GTM’s Preview mode to confirm the container is active.
- Click Preview, enter your website URL, and select Connect.
- A debug panel will appear, indicating which tags are firing on your site.
Create a Conversion Goal in MyBid
- Log in to your MyBid advertiser account and navigate to the Goals tab.
- Click the + Create conversion goal button.
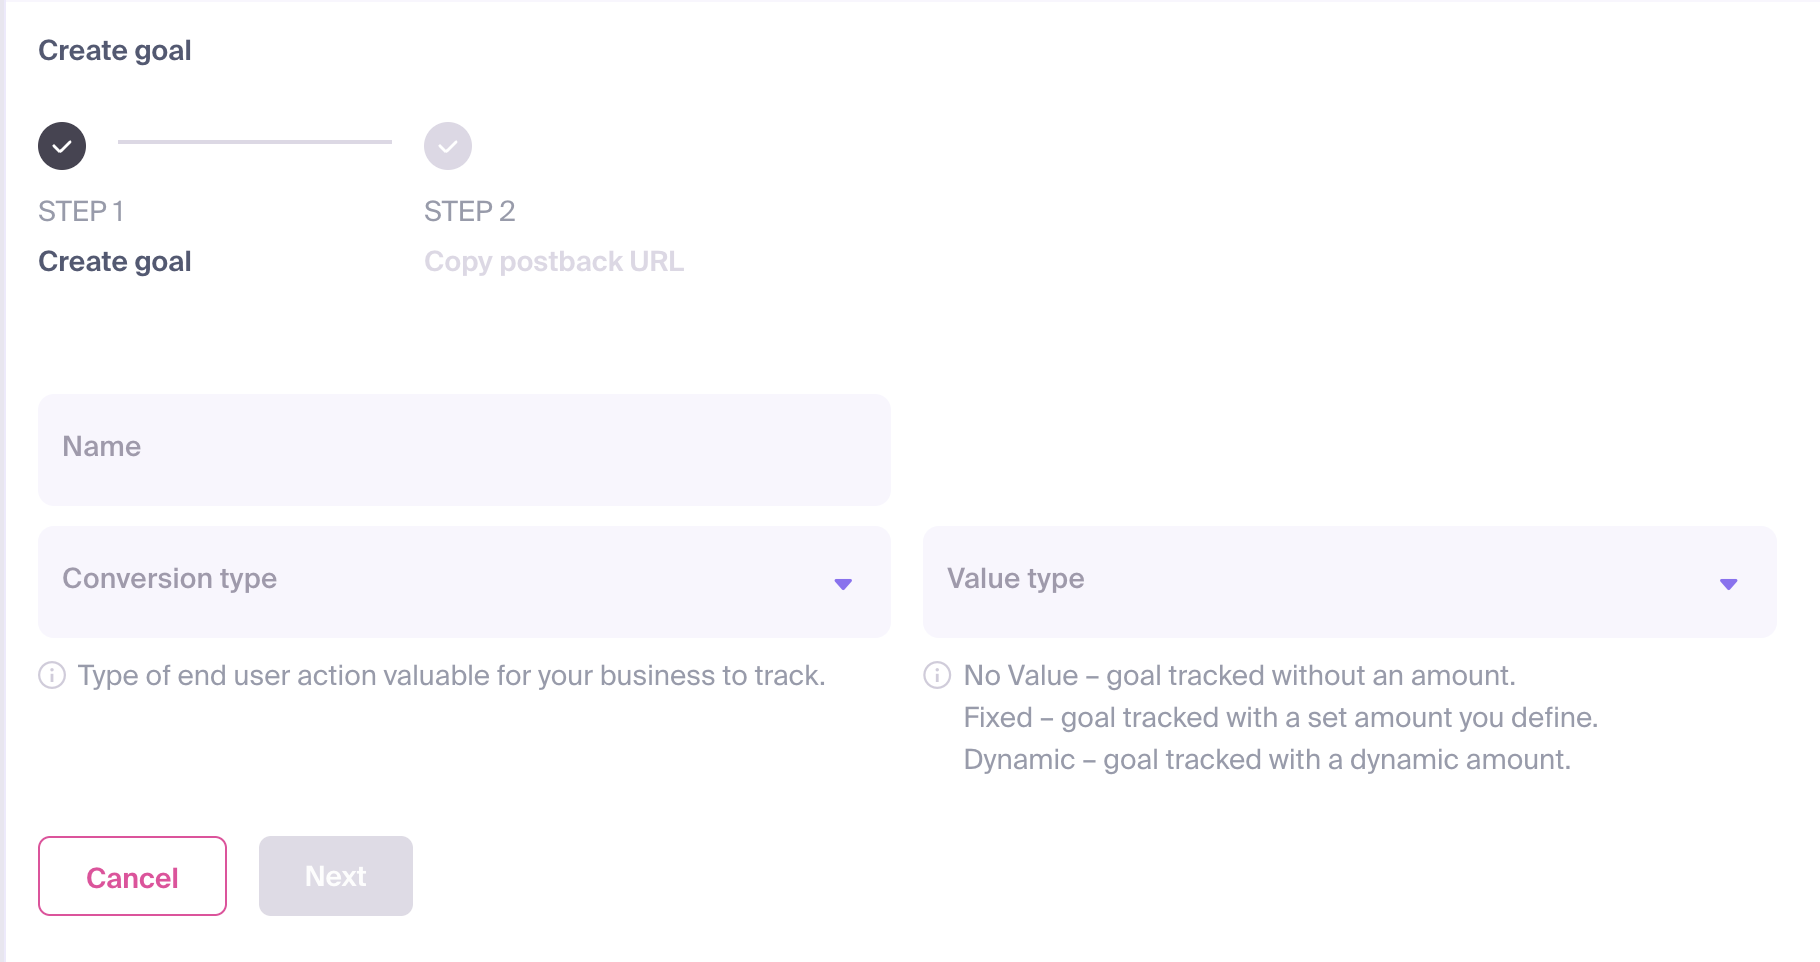
The configuration form will appear, requiring the following details:
- Name: Assign a clear and descriptive name that reflects the specific action (e.g., "Registration" or "Sale").
- Conversion Type: Select the category that best matches the user's action.
- Value Type: Define the payout for the conversion. This value is used to calculate your campaign's Revenue and ROI (Return on Investment). You can choose from:
- No Value: No specific monetary amount will be attributed to the conversion.
- Fixed: Assign a static amount for every conversion of this type.
- Dynamic: The conversion value will be passed dynamically through your postback URL.
Once configured, click Next.
A Postback URL will be generated. Note the
goal_idparameter in this URL.
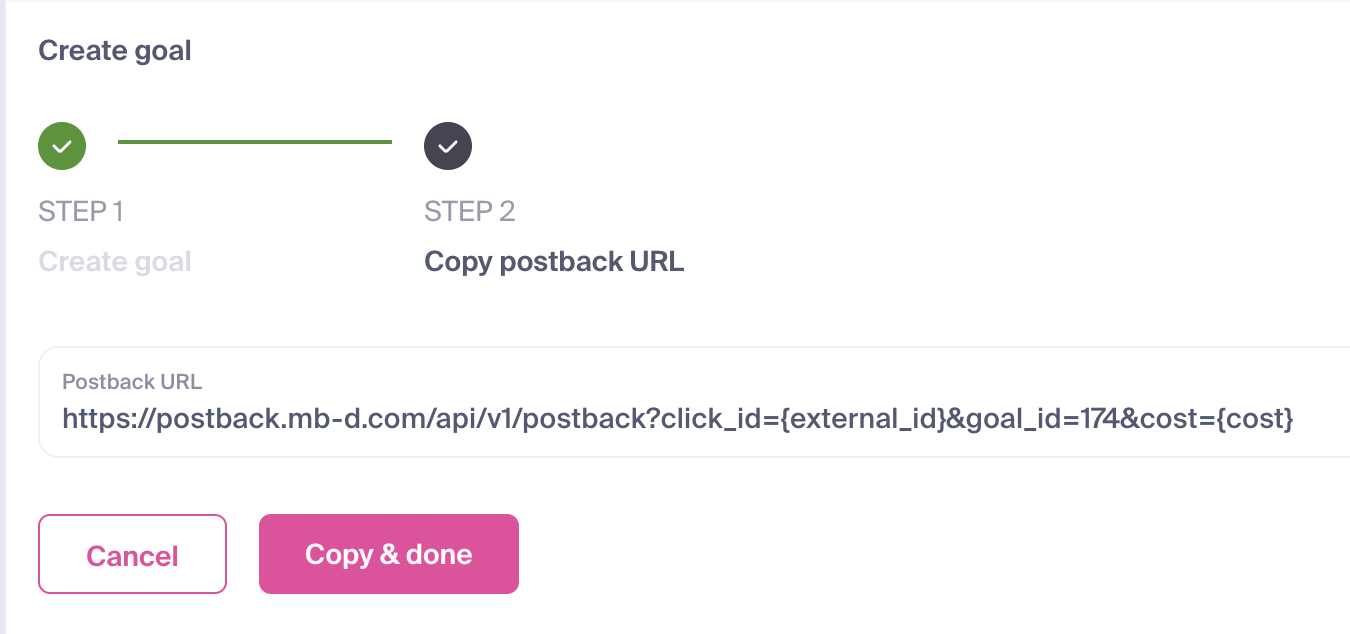
- Click Copy & done to save your new goal and copy the postback URL for integration.
IMPORTANT
Every Conversion Goal is assigned a unique goal_id. This ID is required to correctly associate user actions with the specific goal in your dashboard. Your postback URL should follow this structure:
https://postback.mb-d.com/api/v1/postback?click_id={external_id}&goal_id=186&cost={cost}Deploy the Cookie Collection Script
Create a New Custom HTML Tag
- In your GTM dashboard, navigate to Tags and click New.
- Name the tag "MyBid - Visitor ID Collection".
- Under Tag Configuration, select Custom HTML.
Add the Script
Paste the following Javascript into the HTML field:
<script>
var value = new URL(location.href).searchParams.get("utm_mbid");
if (value) {
    var date = new Date();
    date.setTime(date.getTime() + (30*24*60*60*1000));
    document.cookie = "mybid_visitor_id=" + (value || "")  + "; expires=" + date.toUTCString() + "; path=/";
}
</script>
Set the Trigger
- Click Triggering and select All Pages.
- Save and publish your changes.
EXPLANATION
This script extracts the utm_mbid parameter from your landing page URL and stores it in a cookie named mybid_visitor_id for 30 days.
Deploy the Event Tracking Script
Create an Event Tag
- In GTM, create a second Custom HTML Tag.
- Name it "MyBid - [Event Name] Postback" (e.g., "MyBid - Registration").
Add the Postback Script
Paste the following script into the HTML field:
<script>
var visitorId = ('; ' + document.cookie).split('; mybid_visitor_id=').pop().split(';')[0];
if (visitorId) {
    var xhr = new XMLHttpRequest();
    // Replace the placeholders below with your actual data
    var goalId = 'ADD_YOUR_GOAL_ID_HERE';
    var costValue = 'ADD_YOUR_VALUE_HERE';
    xhr.open('GET', 'https://postback.mb-d.com/api/v1/postback?goal_id=' + goalId + '&cost=' + costValue + '&click_id=' + encodeURIComponent(visitorId), true);
    xhr.send();
}
</script>
Configure Variables
- GOAL_ID: Replace
ADD_YOUR_GOAL_ID_HEREwith your uniquegoal_id. - VALUE: Replace
ADD_YOUR_VALUE_HEREwith your conversion value:- Use
{cost}for Dynamic value types. - Use the exact number for Fixed value types.
- If using No Value, remove the
&cost=parameter entirely.
- Use
EXPLANATION
This script retrieves the Visitor ID from the stored cookie and transmits it back to the MyBid server when the event trigger fires.
Set the Trigger
- Select the trigger that corresponds to your target action (e.g., a "Thank You" page load or a specific button click).
- Save and publish the tag.
Campaign Target URL Configuration
Ensure your MyBid campaign Target URL correctly passes the click ID using the utm_mbid parameter:
https://your-site.com/?utm_mbid={%click_id%}IMPORTANT
The domain used in your campaign must be identical to the domain where the conversion events occur for the cookie to be accessible.