How to Set Up Conversion Tracking with CPV Lab
Integrating MyBid with the CPV Lab tracker allows you to accurately monitor your campaign performance. Follow these steps to configure your Postback URL and align your tracking parameters for precise data reporting.
Step 1: Create a Conversion Goal in MyBid
Before setting up CPV Lab, you must generate a unique Goal ID within your MyBid dashboard to serve as the endpoint for your conversion data.
- Log in to your MyBid advertiser account and navigate to the Goals tab.
- Click the + Create conversion goal button.
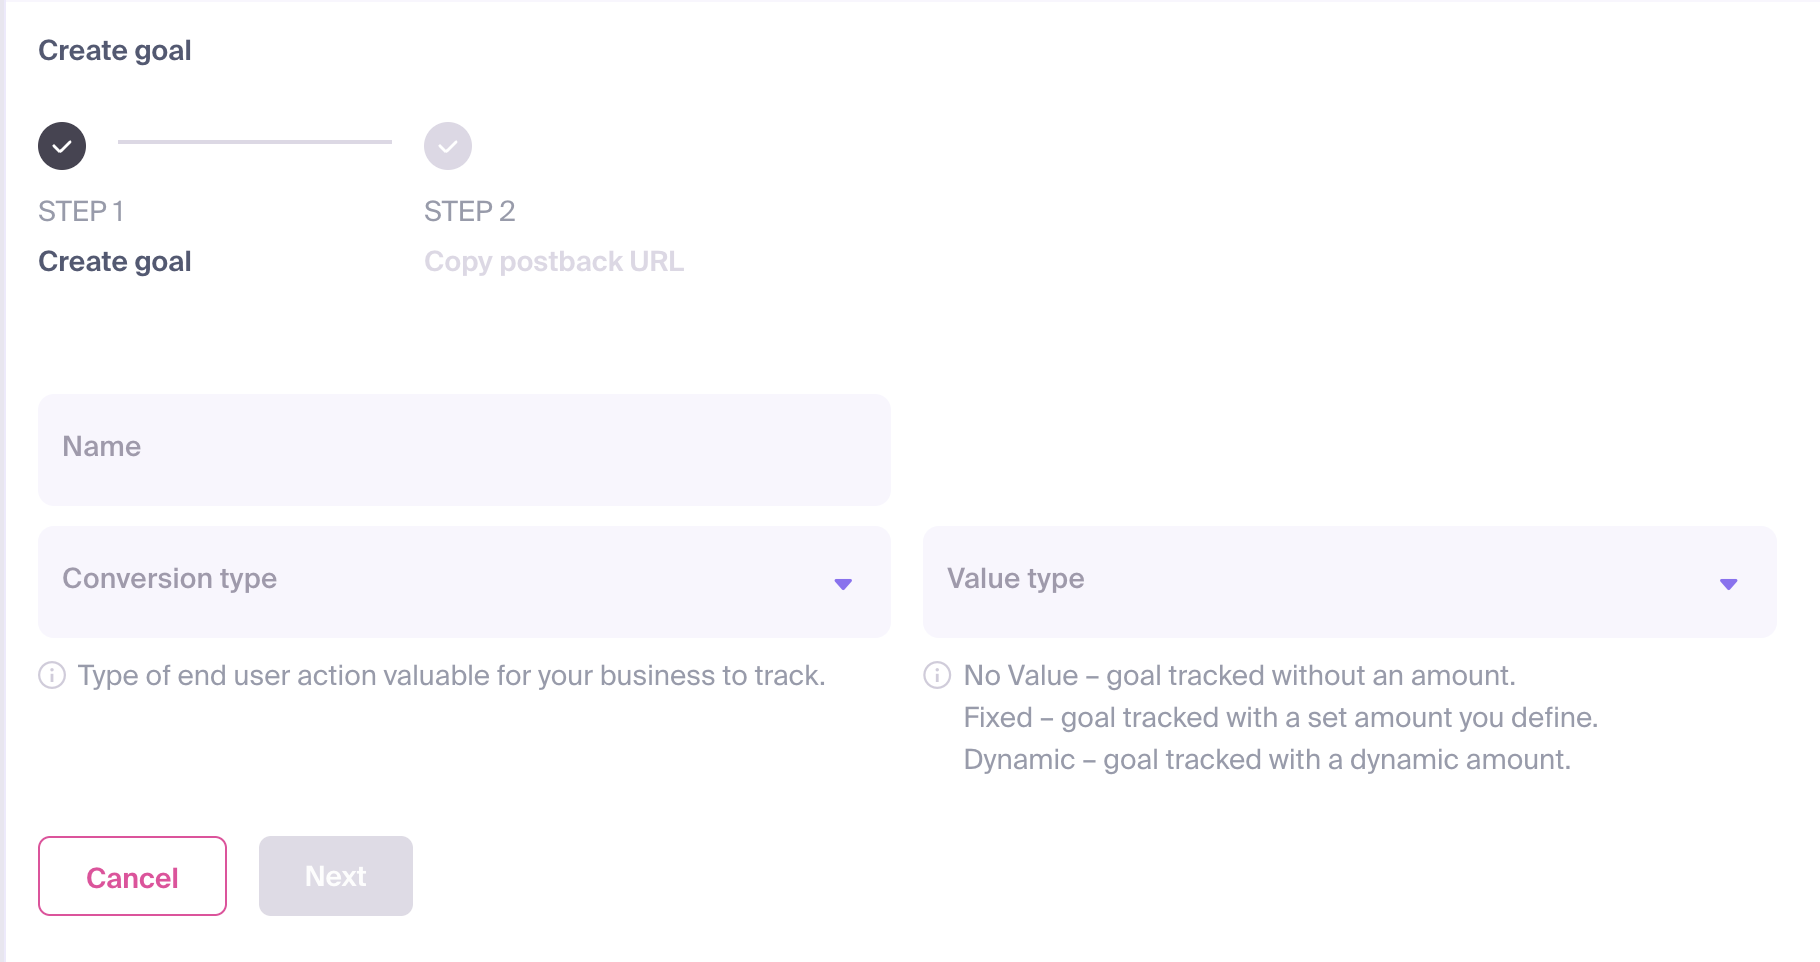
The configuration form will appear, requiring the following details:
- Name: Assign a clear and descriptive name that reflects the specific action (e.g., "Registration" or "Sale").
- Conversion Type: Select the category that best matches the user's action.
- Value Type: Define the payout for the conversion. This value is used to calculate your campaign's Revenue and ROI (Return on Investment). You can choose from:
- No Value: No specific monetary amount will be attributed to the conversion.
- Fixed: Assign a static amount for every conversion of this type.
- Dynamic: The conversion value will be passed dynamically through your postback URL.
Once configured, click Next.
A Postback URL will be generated. Note the
goal_idparameter in this URL.
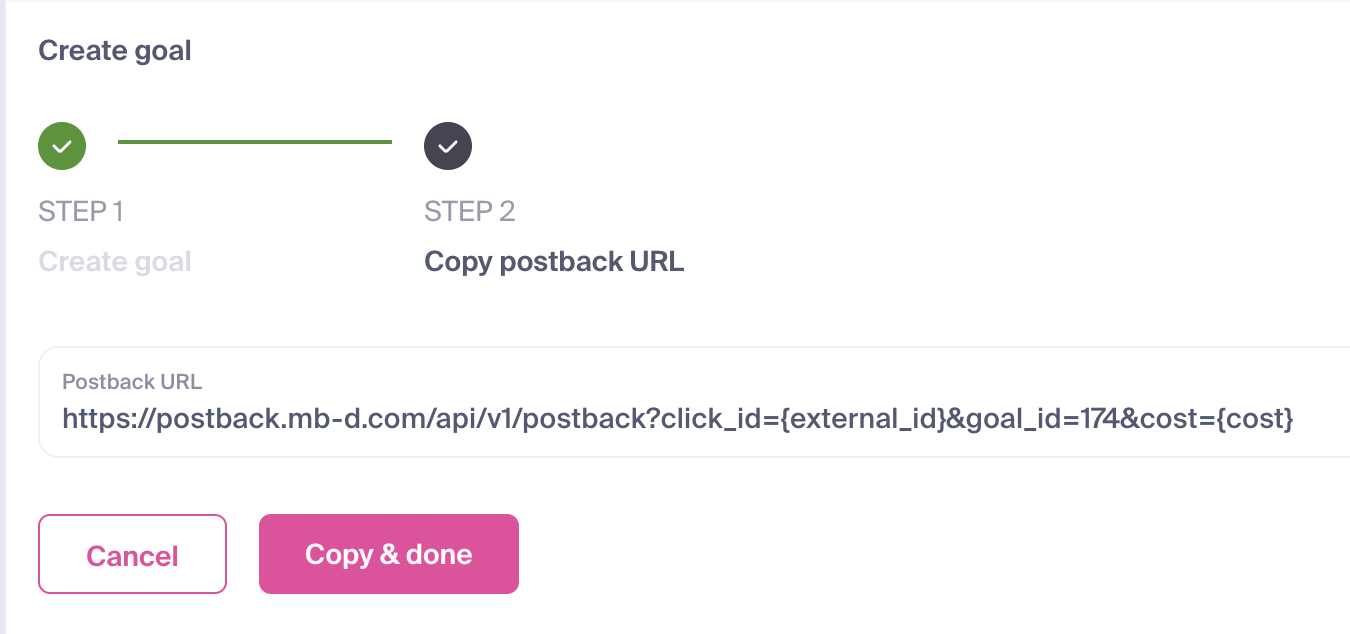
Click Copy & done to save your new goal and copy the postback URL for integration.
You are now ready to implement the postback in your tracking software or third-party platform.
IMPORTANT
Every Conversion Goal is assigned a unique goal_id. This ID is required to correctly associate user actions with the specific goal in your dashboard. Your postback URL should follow this structure:
https://postback.mb-d.com/api/v1/postback?click_id={external_id}&goal_id=186&cost={cost}Step 2: Add MyBid as a Traffic Source in CPV Lab
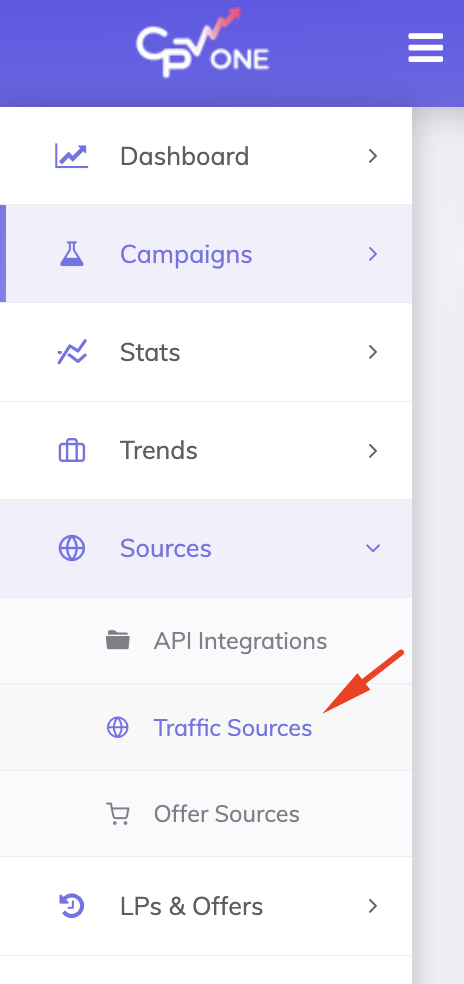
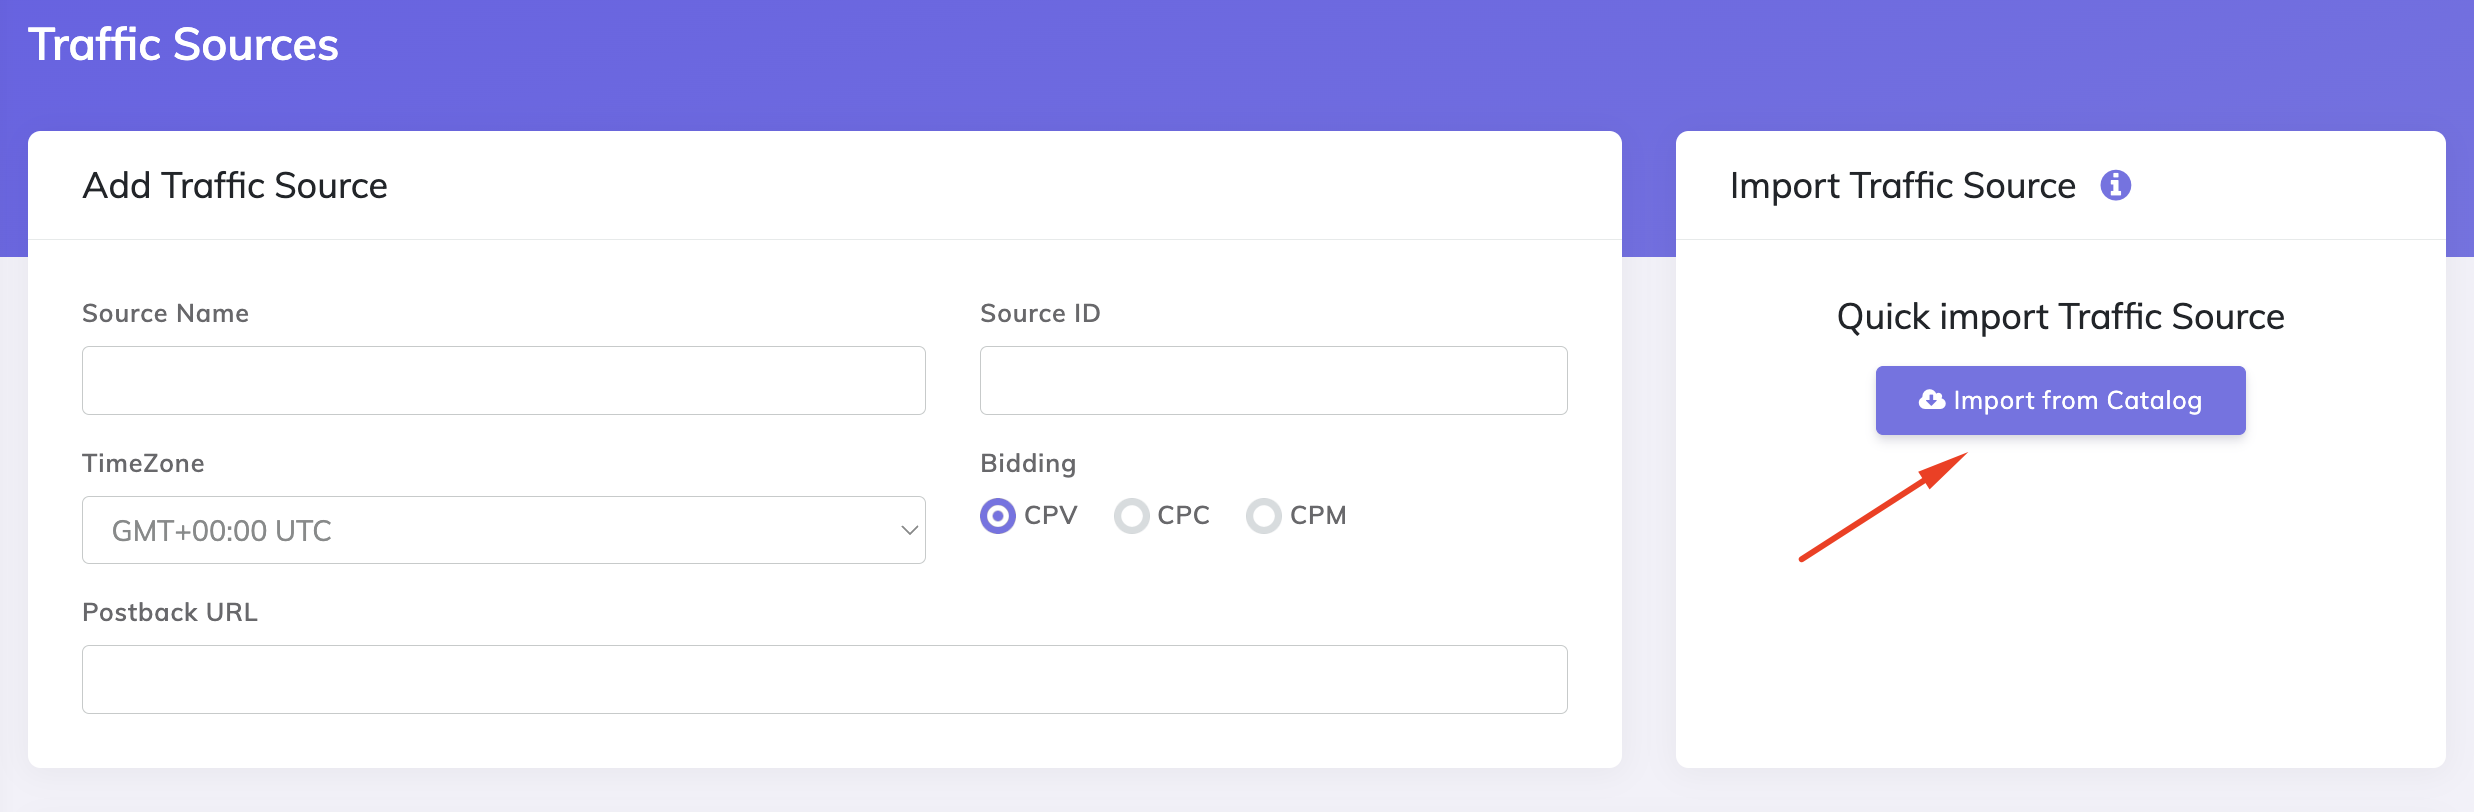
- Log in to your CPV Lab account.
- Click Sources and select Traffic Sources from the dropdown menu.
- Click the Import from Catalog button.
- In the search field, type MyBid, and click the MyBid logo to select it.
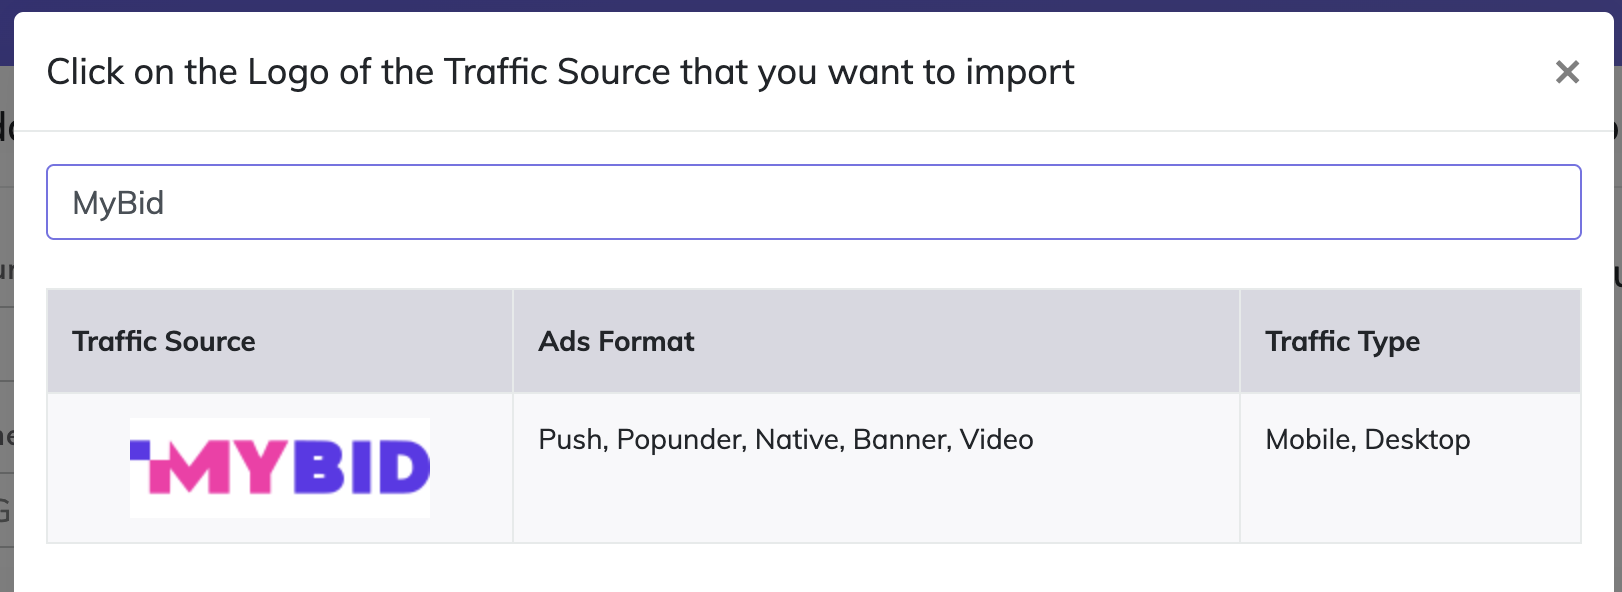
- CPV Lab will automatically pre-populate the essential traffic source parameters.
- Postback URL Configuration: Locate the word REPLACE in the URL field and substitute it with the
goal_idyou generated in Step 1.

Your finalized postback URL should resemble the following: https://postback.mb-d.com/api/v1/postback?click_id={!tscode!}&cost={!revenue!}&goal_id=9999(Where 9999 is your specific goal_id)
NOTE
If you selected a Fixed Value in MyBid, replace the dynamic {!revenue!} placeholder with your exact payout amount (e.g., &cost=1.50).
- Click Save to store the MyBid settings in CPV Lab.
Step 3: Configure Affiliate Network and Offers
To receive conversion notifications, you must add the CPV Lab Postback URL to your affiliate network's panel. This ensures that when a conversion occurs, CPV Lab is notified and can subsequently fire the postback to MyBid.
For detailed instructions on adding networks and offers, refer to the CPV Lab documentation or contact their support team:
The Postback URL will be accessible after you select the relevant Offer Source from your list.
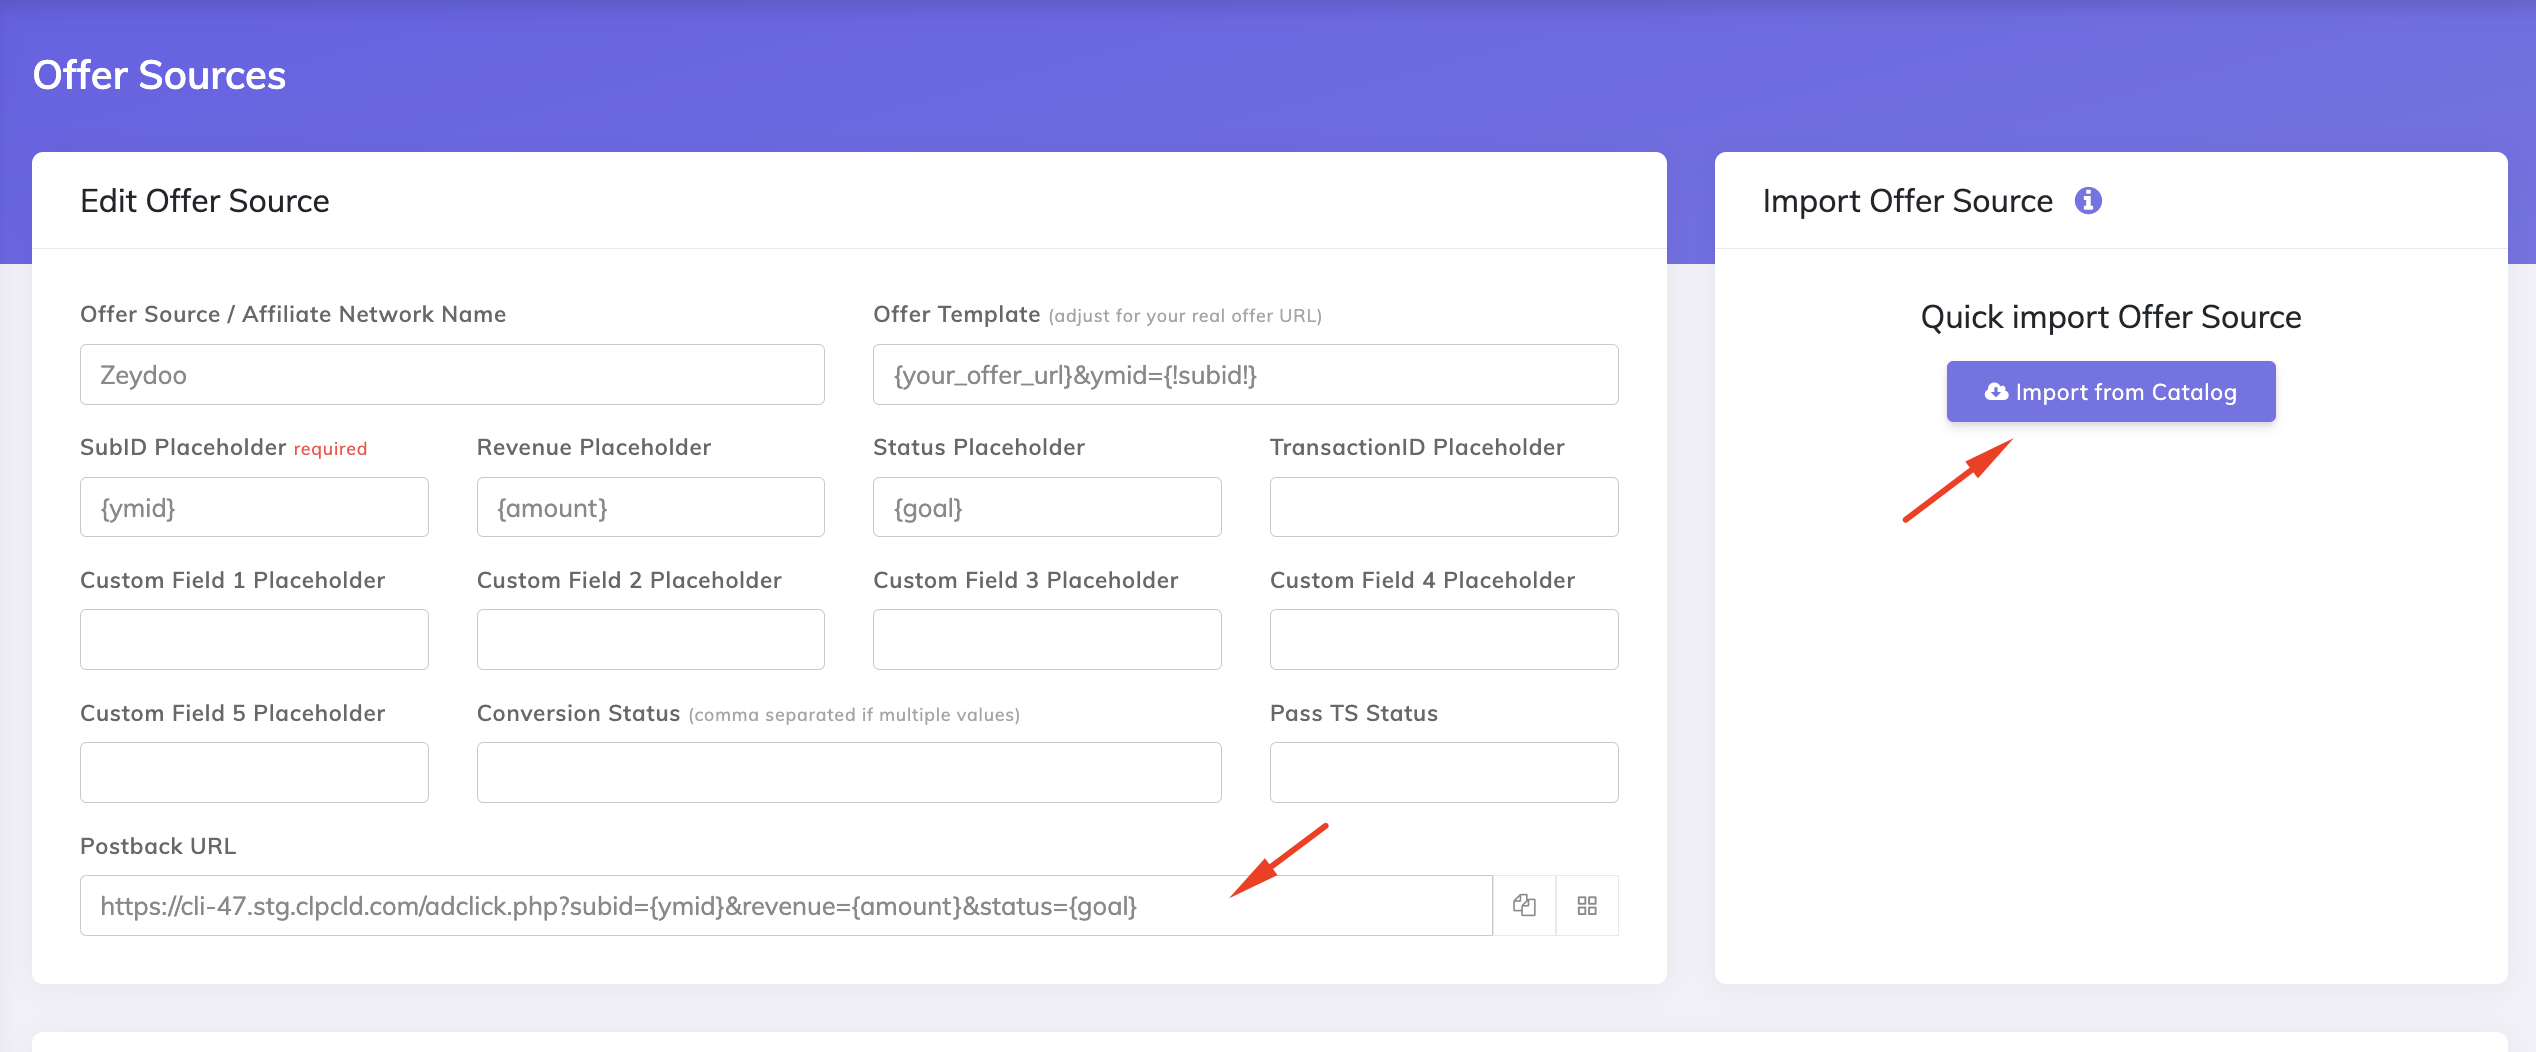
Once you obtain your CPV Lab Postback URL, paste it into your affiliate network panel to pass conversion data back to the tracker.
IMPORTANT
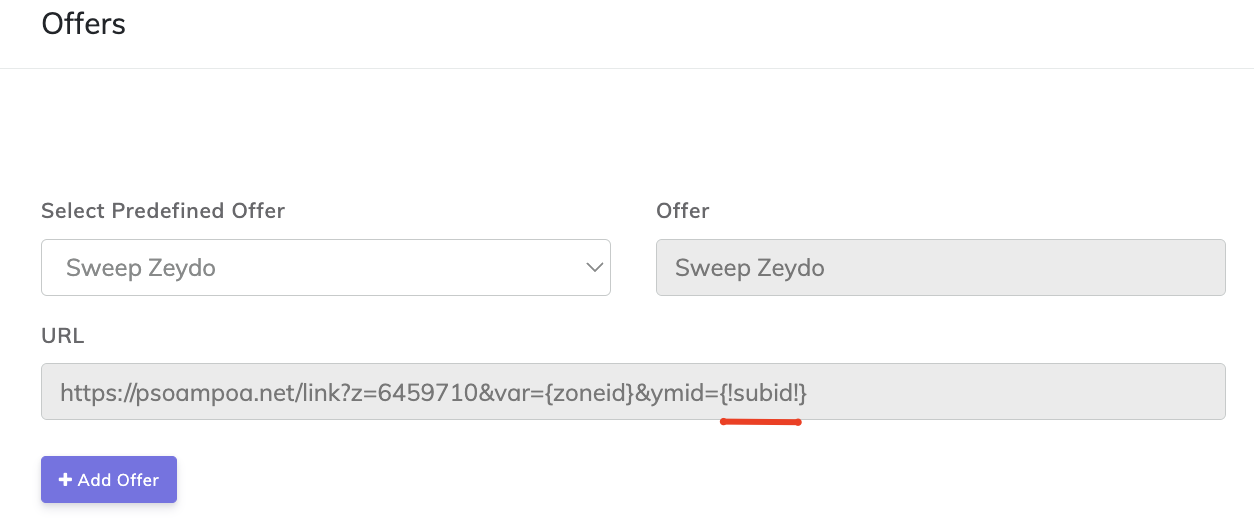
When adding an Offer, ensure that you correctly map the {!subid!} placeholder (or the corresponding token for your network) to pass the unique click ID back to CPV Lab for each conversion.
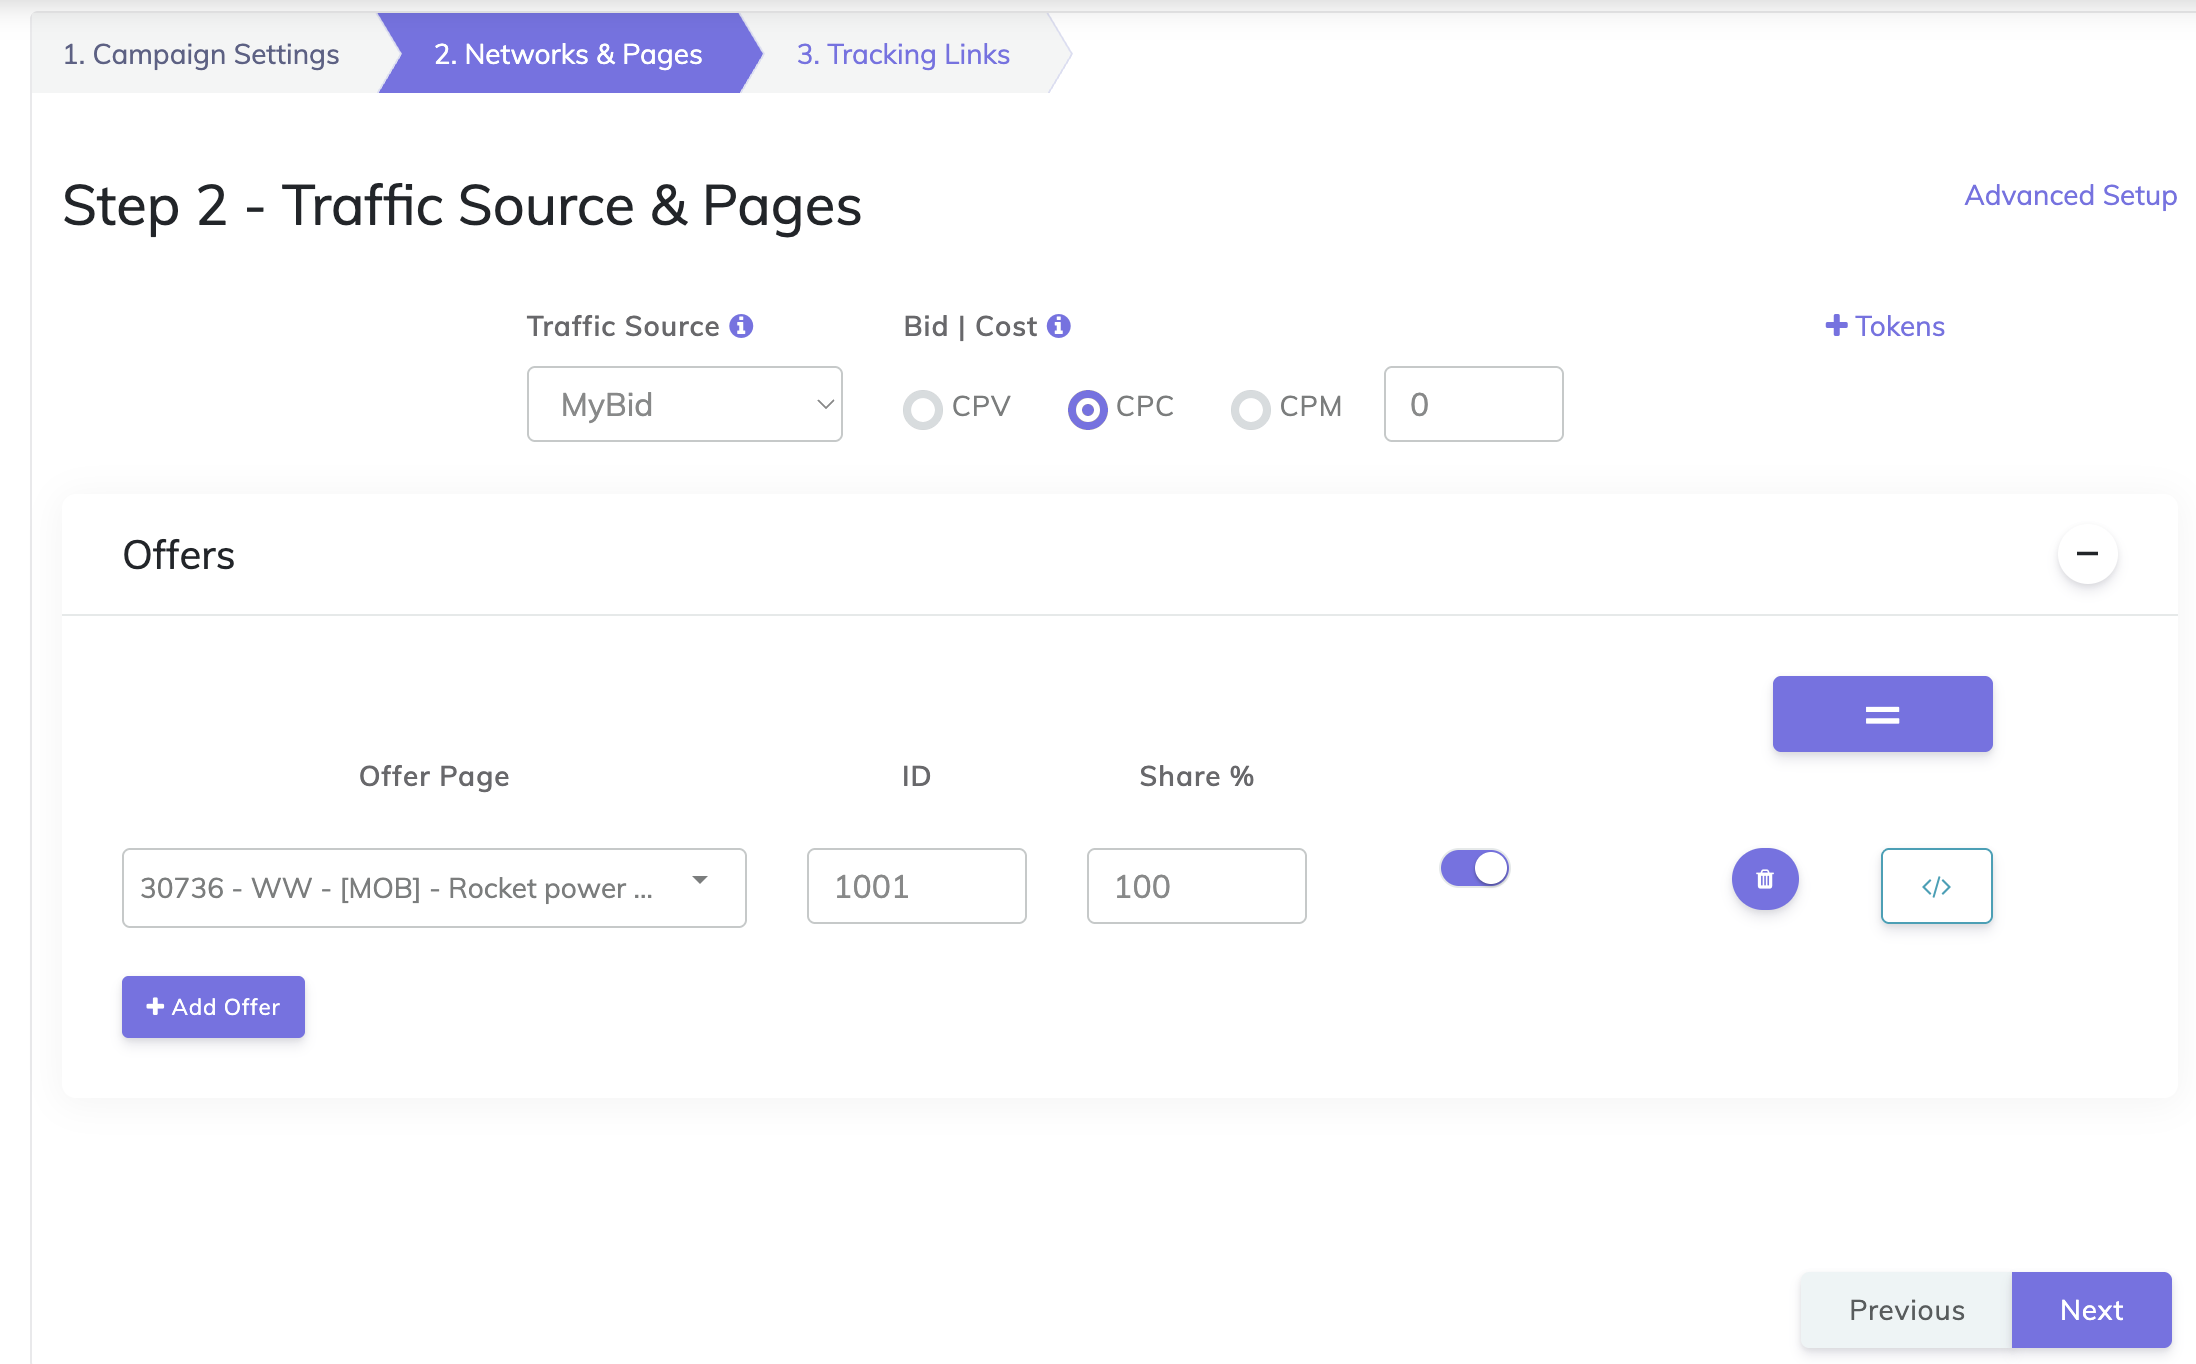
Step 4: Create a Campaign in CPV Lab
- Navigate to the Campaigns tab and select Quick Campaign Setup.
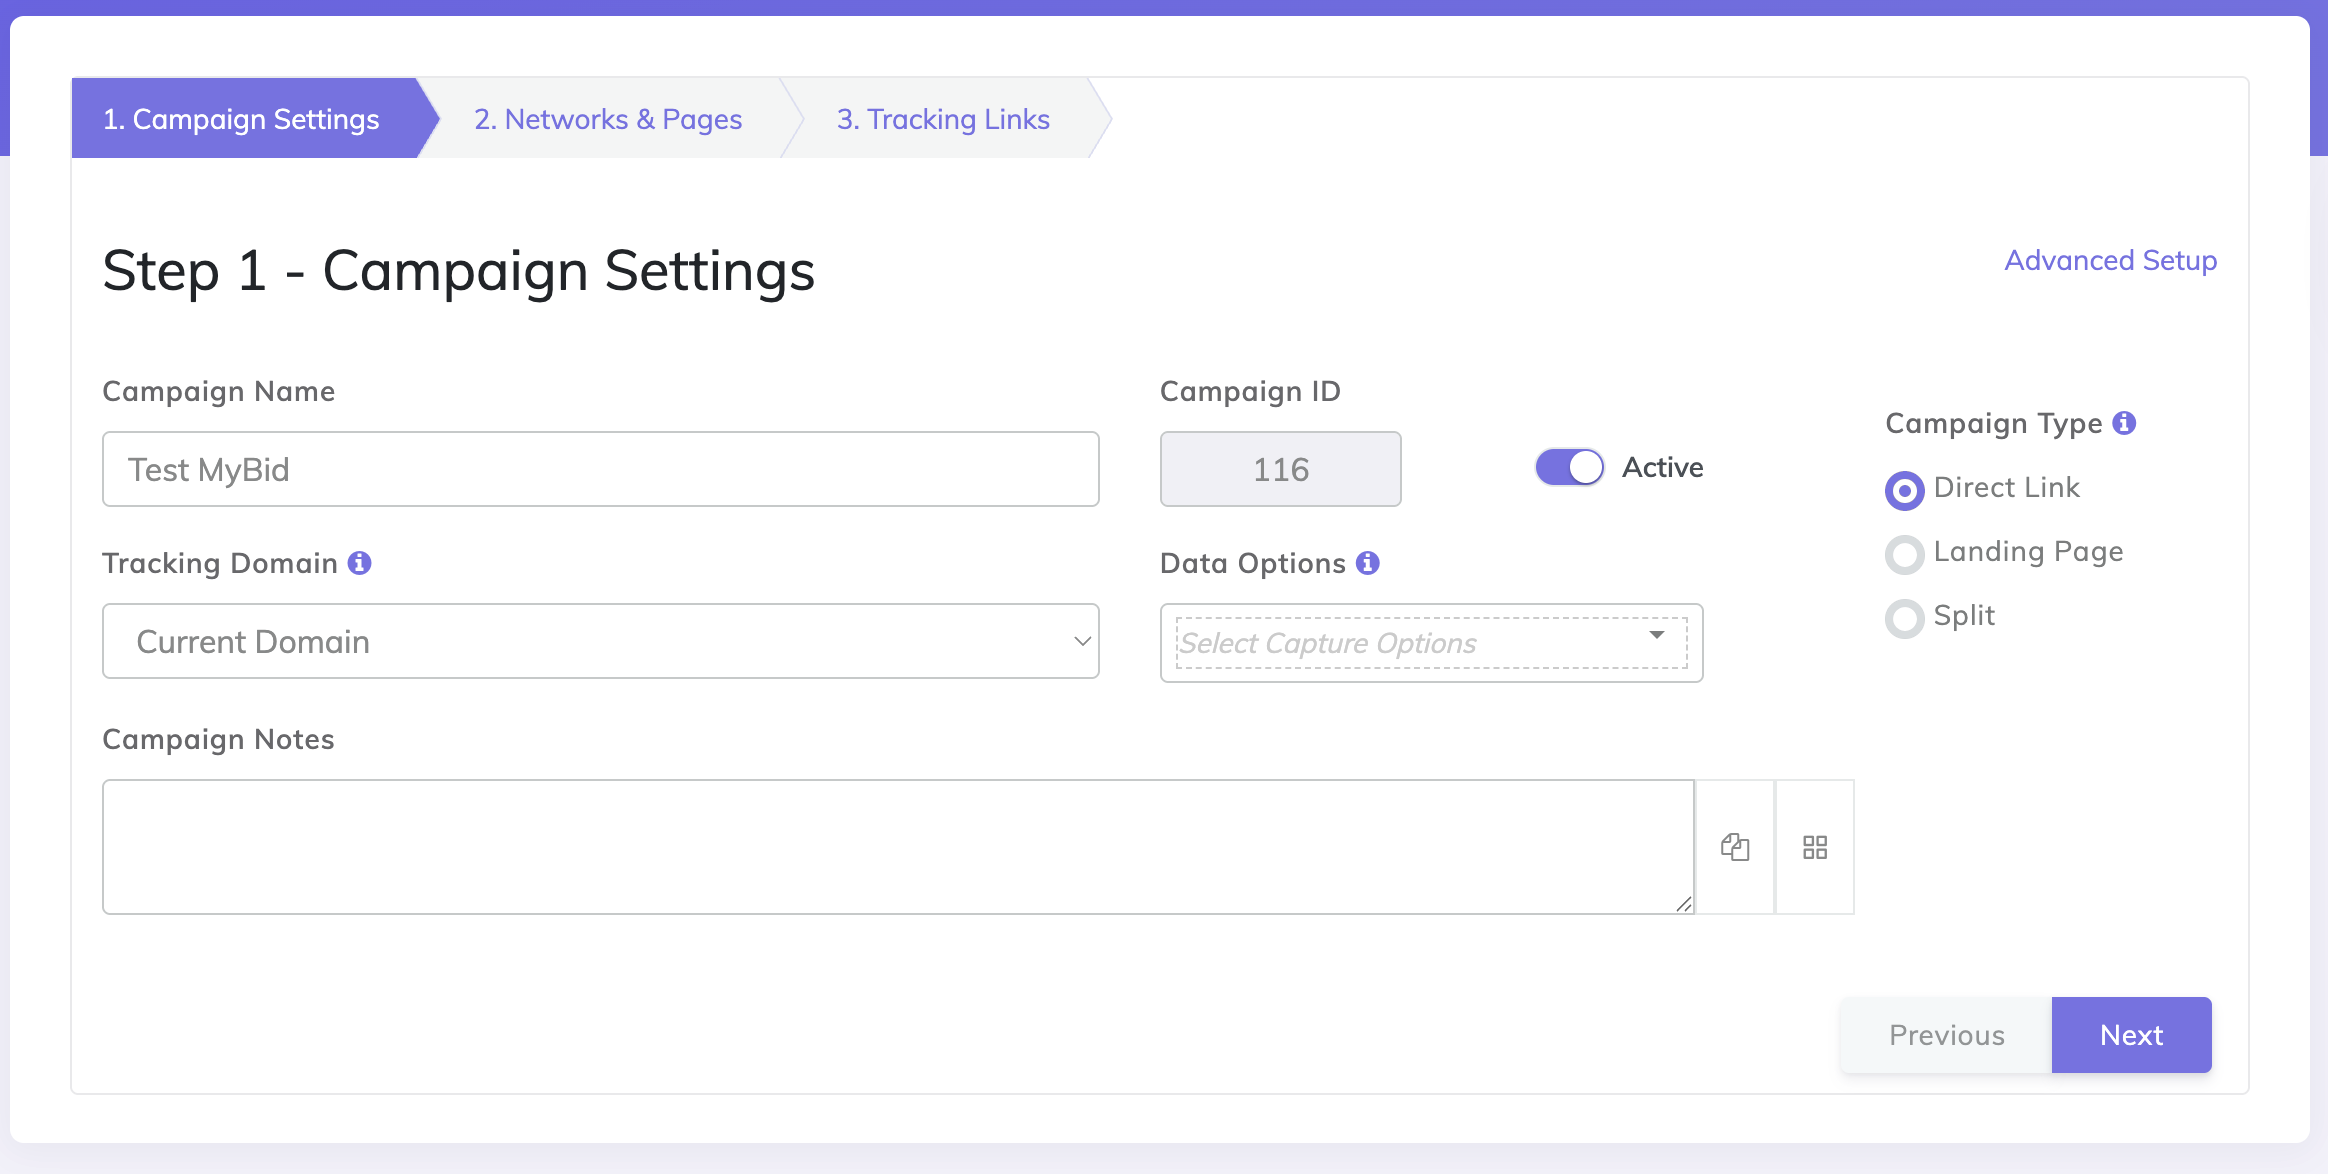
- Select MyBid as the Traffic Source.
- Choose the appropriate offer for this campaign and click Next.
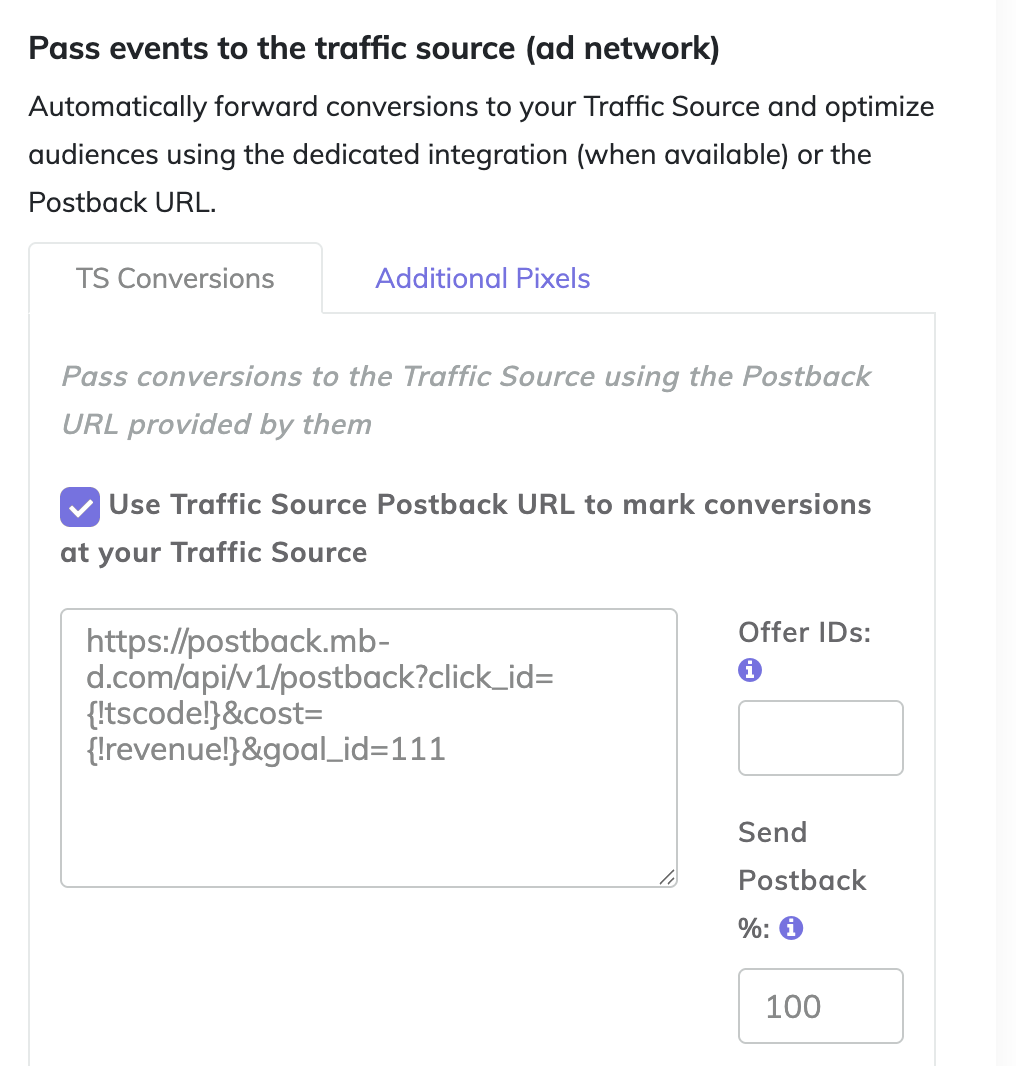
- In the Tracking Links & Conversions Postbacks step, enable the option: "Use Traffic Source Postback URL to mark conversions at your Traffic Source".
- Click Save Campaign.
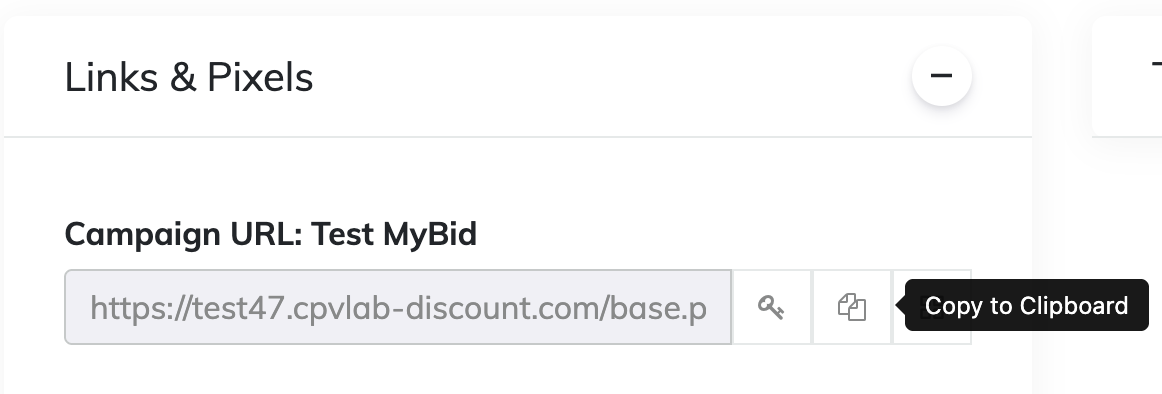
- Copy the generated Campaign URL—this is the Ad URL you will use in MyBid.
Step 5: Finalize Setup in MyBid
- Log in to your MyBid advertiser account.
- Create a new campaign or edit an existing one.
- Paste the Campaign URL provided by CPV Lab into the URL field of your MyBid campaign settings.
IMPORTANT
It is critical to use the exact Campaign URL provided by CPV Lab to ensure all tracking macros are passed correctly back to your tracker.